Stop KDP Rejections: The Power of Interior Margin Templates
The Silent Reason Your Book Gets Rejected
You’ve poured months into your manuscript. You’ve invested in a stunning cover design. You’ve written a compelling book description. You hit "Publish" on Amazon KDP, filled with anticipation, only to receive that dreaded email: your book has been rejected. The reason? Often, it’s not the content but the interior formatting. Margins are too narrow, text bleeds into the gutter, or essential content gets trimmed off. This is where KDP Interior Margin Templates become your most valuable, yet simplest, design asset.
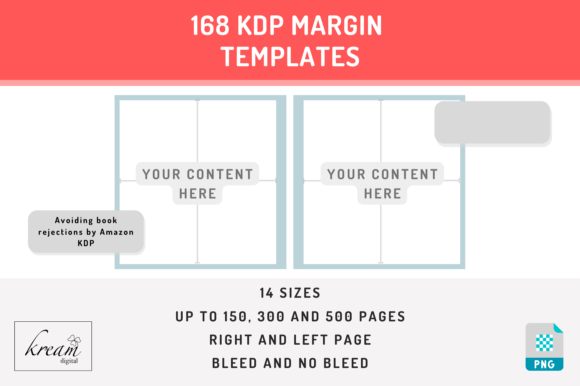
These aren't complex design software plugins. They are straightforward, transparent PNG files designed to overlay your entire page layout. Think of them as a digital cutting mat and safe-zone guide combined. They provide a clear visual framework showing exactly where Amazon’s printing presses will cut the paper (the trim line), where the safe zone for your text and critical graphics is (the light blue border), and, for bleed designs, where your background images should extend to. Using them is the difference between a professional, rejection-proof book and one that fails at the final hurdle.
A Template for Every Book: Navigating Trim Sizes and Page Counts
The beauty of a robust set of KDP Interior Margin Templates is their specificity. They are not one-size-fits-all. The collection you use should be meticulously matched to the exact specifications of your project. This starts with the trim size—the final, physical dimensions of your book. Whether you're creating a standard 6"x9" novel, a compact 5.5"x8.5" memoir, a large 8.5"x11" workbook, or a unique 8.25"x8.25" square art book, there is a template designed for that precise footprint.
Crucially, templates are also divided by two key factors:
- Bleed vs. No Bleed: A "no bleed" book has a white border around every page. All text and images must stay within the safe zone. A "bleed" book allows images or colored backgrounds to extend to the very edge of the page, creating a more immersive, professional look for photography books, children's books, or graphic novels. The templates for bleed designs will have a different safe zone indicator, showing you how far your art must extend to avoid an unprinted white sliver at the edge.
- Page Count: This is the secret sauce many authors overlook. The gutter margin—the inner margin where the pages are bound—needs to be wider for a thicker book to ensure text isn't swallowed into the spine. A 150-page novel requires a different gutter margin than a 500-page epic fantasy. Quality templates are provided in sets for common page ranges (e.g., 150, 300, and 500 pages), automatically adjusting the inner margin width to account for the book's bulk.
Practical Application: Your Step-by-Step Design Guide
Using these templates is a simple, foolproof process that integrates seamlessly into any design workflow, whether you're using Adobe InDesign, Canva, Affinity Publisher, or even PowerPoint.
- Select Your Match: First, identify your book's exact trim size. Then, determine if you need a bleed or no-bleed template. Finally, choose the template file corresponding to your final page count. This three-step match is non-negotiable for accuracy.
- Overlay and Design: Place the chosen PNG template as the top layer in your design file, stretching it to cover the entire page canvas. Ensure it's perfectly aligned. Now, design your interior. Place your text, images, and decorative elements. The template acts as your constant guide.
- Respect the Zones: The light blue border on the template is your safe zone. All essential text, page numbers, and critical parts of images must stay inside this area. For a bleed book, your background images should extend all the way to the outer red trim line, but important content (like a person's face in a photo) should still be within the blue safe zone to avoid being cut off.
- Use Left and Right Pages Correctly: This is critical for a professional look. In your design software, set up facing pages. On odd-numbered (right-hand) pages, use the template marked for the right side. On even-numbered (left-hand) pages, use the template marked for the left. This ensures the wider gutter margin is always on the spine side.
- Final Cleanup and Export: Once your design is complete and every element is perfectly placed within the zones, delete the template layer. Do not leave it in your final file. Export your interior as a high-resolution PDF, carefully checking the quality of your images and the crispness of your text.
By following this method, you're not just avoiding rejection. You're adopting a professional publishing standard. You ensure your reader has a comfortable, beautiful experience, with text that is easy to read and images that are perfectly presented. This attention to detail elevates your brand as an author or publisher, signaling quality and care that builds audience trust and recognition. It’s a foundational piece of your book’s brand identity, as crucial as your cover design or author voice. For any serious publisher, entrepreneur using a book as a marketing tool, or content creator expanding into print, mastering the use of KDP Interior Margin Templates